Pages

About Me

My photo
My name is Lucy and I have never blogged before. Well that's a lie. I have, but it was this one, and I neglected it for a little while... I live in a commuter town outside London having moved here about a year and a half ago after making some pretty big changes in my life. I share a beautiful little cottage on the Grand Union Canal with 1 crazy beautiful little girl and an equally crazy cat called Bandit (appropriately named as he now lives in all the houses on the street and steals...). Lawyer/working mum and it would appear, terminally single (I've reserved my spinster plaque already) I was fortunate to escape the evil commute about a year ago but seem to have less time than ever.... If I entertain you, make you laugh or fume (or make you have an emotion of ANY description) then my job is done. Enjoy x

Thursday, 10 September 2015

What do you mean you don't like peanut butter??!

I've not exactly been showering myself in glory in terms of "mother of the year" lately.  I mean lets take last weekend as a prime example.  Instead of spending the bank holiday weekend with Madam I abandoned her (to her father obviously, I didn't leave a couple of boxes of cold Dominos in the kitchen and tell her "I wont be long") to go cover myself in glitter, don spandex and party in a field near Northampton at the glorious Shambala.  To be fair it was my birthday and at 33 years old it seemed utterly necessary to pop my festival cherry.  God that sounds so pathetic at 33...practically on the "Never Been Kissed" spectrum.  So yes, I had some time out and came back thinking I needed to step up my game this weekend to make up for it. 

Now we, like most of the country and (if Buzzfeed is taken as gospel WHICH IT SHOULD BE) the world, are completely engrossed in The Great British Bake Off.  Pose provides full commentary and critique whilst I sit thinking how I'd quite like to enter GBBO but not sure the BBC would approve of the sweet looking 33yo baker swearing incessantly in the background.  Inspiration peaked by Ugne's PB&J ice cream roll (GET IN MY BELLY NOW), Pose and I decided to do a little mummy-Pose-baking-bonding.

Peanut butter is food of the gods.  Fact.  You simply can't make me think otherwise.  I'm stunned that other than peanut butter cookies I've never really tried baking with peanut butter.  Or I'm just a purist.  I dunno.  Anyway, we thought we'd do something with peanut butter...and jam....and cake...and then wrap it all up in chocolate.  Because why wouldn't you!?

Recipe - PB&J Cake Pops from my own head

Ingredients

Cake pops:
¾ cups plain flour
½ tsp. baking powder
pinch of salt
¼ cup unsalted butter, softened
⅓ cup granulated sugar
1 egg
1 egg yolk
1 tsp. vanilla extract
¼ cup full fat milk

Filling:
Peanut Butter
Jam

Icing:
Slab of chocolate covering for cake (or chocolate,  but I had cake covering in the cupboard (as you do))

Equipment:
Cake pop maker
Cake release spray
Sticks (for the cake pops, I don't mean random sticks from the garden obvs)
Tray covered in baking parchment

(makes about 15 cake pops)

Method
1. Turn on the cake pop maker and spray the inside with a little cake release spray.
2. Sift the flour, baking powder and salt into a bowl.
3. Using a food mixer (or not, your call) beat the butter until pale and fluffy, then gradually beat in the sugar until its fully incorporated. 
4. Next, reduce the speed and beat in the egg, the egg yolk and the vanilla. 
5. Reduce the speed again to low and gradually add the flour and milk (alternating) to the mix until its all blended.
6. Spoon a little of the batter into each cake "hole" (about ¾ of the way), then dollop a little peanut butter and a little jam into the centre.  Spoon a little more of the batter onto the top (so its about to go over the brim).  Close and cook for about 6mins. 
7. Once the cake pops are cooked, carefully ease them out and put on a wire rack to cool.  Make more batches.


The perfectionist in me is disappointed in the lack of roundness, but what are you going to do eh?


8. Break the chocolate covering into even(ish) chunks and melt in a glass bowl over a pan of boiling water (or microwave it - I just don't have a microwave and yes I am ok with that). Once its all melted, take it off the heat.
9. Carefully put a stick in a cake pop (its a bit fiddly as the filling makes them a little unstable) and even more carefully dump into the melted chocolate and cover the whole thing in chocolate.  Put the cake pop cake side down onto the baking parchment.  Repeat with all the other cakes and let cool.


10. EAT ALL OF THEM AT ONCE.  

Yes that's a steering wheel.  I had a cake pop for breakfast.  Don't judge me.


This was all a bit of an experiment not least because I'd never used a cake pop maker before so I was pleasantly surprised by the outcome.  Personally I think the texture of the cake was a bit close so I'll probably switch up the recipe a bit.  It could also be that the PB&J center affected the bake (ooooh I sound all Mary Berry!).  Regardless it'll need some refinement work which will mean a lot of tasting and then more tasting.
 
Damn.

Friday, 7 August 2015

Fake it and bake it - Oven Baked French Toast

When it comes to being a good mama in the kitchen (I've said it before) I live my life chasing the 1950s housewife ideal. I guess these days its more Mrs Flax in Mermaids and less Betty Draper in Mad Men...but then again maybe Betty Draper isn't someone to aspire to?  I mean her relationship with her daughter was pretty shitty and she smoked a lot...her love of a good cocktail is something I can most definitely get behind though. Then again, that description would fit Mrs Flax as snug as one of her wiggle skirts so I guess this means to be a good 1950s mama you basically needed to be able to balance looking fabulous standing next to the kitchen sink, balancing a cigarette in one hand and a dirty martini in the other.  As aspirations go, I got this.

When you watch 1950s era movies and tv shows (or in fact ANY American tv featuring a family) it's a given that there'll be a scene where the family are having a good ole all American Sunday brunch, be it pancakes, waffles or French toast.  A fry up it ain't.  When I lived in the US, Sunday's meant the Cromwell Diner and eggs benedict.  These days Sunday mornings are usually about 1 of 2 things depending on if Pose is with me.  If no Pose, its for chilling out and living every parent's fantasy - having a lie in (sorryI'mnotsorry there have to be SOME perks to divorce) - if yes Pose, then its still about chilling but also having quality time together.  So when I asked her what she wanted for breakfast a few Sundays ago and she produced a cookery book I got free with my pizza stone (which she claims is hers and lives in her play kitchen) I couldn't really say no.  I flicked through the book and landed on a recipe for oven baked French toast which peaked my interest, so naturally I put the cook book down, went into the kitchen and improvised.

Recipe - Oven Baked French Toast from my own head

Ingredients
1 egg
Good glug of milk (lets say 100ml)
1tbs caster sugar
½ tsp cinnamon
1 vanilla pod (if you have one otherwise no biggie)
Dash of vanilla essence
Sliced white bread (or whatever you have)

Method
1. Pre-heat the oven to 200C and grease an ovenproof dish.
2. Put all the ingredients (except the bread and the vanilla pod) in a bowl and if you are as fabulous as me and happen to have vanilla pods just lying around (I'm SO Nigella these days, just without all the coke) put a large slash lengthwise and scrape all the seeds into the bowl.  Whisk vigorously.
3. When it comes to the bread prep its pretty much up to you.  I used a large round cookie cutter and cut 4 circles of bread.  Take the bread and dip it in the egg mixture.  Arrange evenly spaced in the dish and pour over the rest of the mixture.
4. Pop in the oven and bake until golden, which is somewhere between 15-20mins.

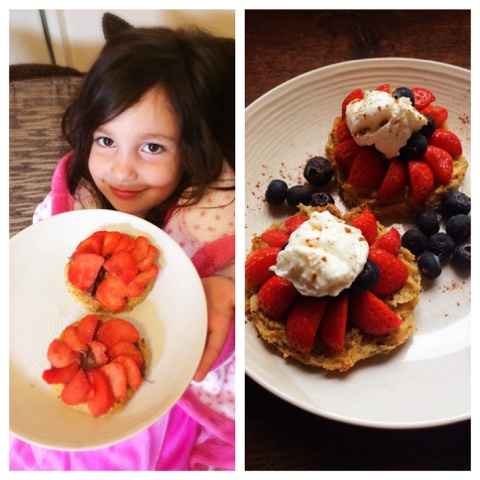
As for serving go with whatever takes your fancy.  I would suggest maple syrup personally but my daughter is weird when it comes to maple syrup and refuses to eat it.  Seriously, she had a melt down when we were in Canada last week because I asked her to try the local maple syrup.  I'm talking FULL BLOWN TANTRUM.  I'm such a horrible mother.

Anyway, Pose opted for boltella* and strawberries, and I went with strawberries, blueberries a bit of greek yoghurt and yes, a drizzle of MAPLE SYRUP FOR ME.  Because, you know, I'm not a little weirdo *eyeroll* 

Well, most of the time.


Ciao for now...where's the amaretto? I've got washing up to do!

*Nutella

Sunday, 12 July 2015

I don't even know you anymore...

So....uh.....hey there!

*she says sheepishly to the blog she's neglected for 2 years like a beautiful pair of horrendously expensive shoes because they were hidden in the back of the cupboard behind the cheap and comfy shoes*

It has been a while hasn't it?  I know, I know.  "Where the hell have you been???"  I hear you cry!! "We thought you were DEAD!!"  Or something less dramatic.  Like "Oh you. Yeah, I'd totally forgotten you did this".  A lot (A LOT) has changed in the last 2 years and in my defence I have been through a...er....transition period.

I got divorced.


In all seriousness, these things happen but it has meant a lot of big changes in our lives.  We moved house into our little cottage on the canal with roses around the front door, little lady started school and is about to finish her first year and I changed jobs again to work closer to home.

We travelled.  As a form of "I'm really sorry I'm divorcing your dad" I took the little lady to Disney World and she was treated like a princess. I went on a girls holiday back to the lovely Paris (twice) and took to the road again on a couple of business trips.  Tried skiing for the first time.  And, having agreed that my ex could take madam back to visit his family for 2 weeks at Christmas, instead of sitting on my arse feeling sorry for myself I decided to have an adventure taking a trip to the incredible Kerala in India for Christmas and learned how to surf.  Well, learned how to stand on a board on white water 15% of the time and spend the rest of the time being put through a washing machine but loving every minute.  I did catch 1 greenie though and I'm taking that for all its worth.

You've not had good curry until you've had it served on a banana leaf,
in a little Indian lady's back garden,
in front of  her cows.

I have of course kept up the baking and testing and tasting and seem to have fallen into the trap of running the cake stall at the school fairs.  Oh and don't think I've forgotten how to make an inappropriate cake, I made some seriously inappropriate cupcakes for another birthday...


Anyway, enough of that shizznit.  My sister has encouraged me to get back to the blogging so I'm back and even if no one else likes it I know I have at least 1 fan!

Thursday, 9 May 2013

I sacked the pigs in blankets and found a better date

So I've not posted again for quite some time (again) but big news....I've quit my job and am making the move from big city firm to big city bank and going in-house.

I.

Can't.

Wait.

I'm being promised a better work-life-balance so hopefully there'll be more mummy-Pose (mummy and Rosetta that is, not that I intend to spend my spare time from now on standing in awkward poses around my house looking like I'm trying to emulate a '70s catalogue) and baking time. Don't get me wrong, I have been baking and I have more than enough things to blog about, I just haven't had the time to blog.

Anyway, so we'll see.

Right now I'm in the first of my 3 weeks off between jobs and am sat by the pool in Malta soaking up a steady 25C and aiming for a nice dark tan. That, and spending time with the fam' are my only goals this week. I have so far napped, swum (albeit briefly, the outside pool is like a glacier melted and I am not really into spending time in the indoor pool), eaten and drunk my way to a slightly rounder tummy (I have a feeling the following 2 weeks will involve trying to lose this spare tyre) and finished 1 book. I figured before I get into the next book I'd write something! Now, I'm writing this on my iPhone so bear with.....

A couple of years back I bought hubby this great tapas cookbook, it's awesome. There are so many great recipes in it. This is the simplest and greatest!

The recipe - chorizo stuffed dates wrapped in bacon

Ingredients:
- 12 dates (pitted or not, it doesn't matter)
- 1 small chorizo sausage
- 6 rashers of streaky bacon

1) If you have dates with the stones in, take the stones out by cutting a long slit down 1 side (lengthways). If your dates are already pitted they should have a good cut already but if not, make the same cut.

2) Cut the chorizo into 12 fairly equal bits. Place a piece of chorizo in each of the slits in the dates and try to mould the date around the chorizo.

3) Cut the bacon in half and wrap a half around each date (you can always use 1 whole piece of bacon if you so fancy - I won't judge).

4) Put each date in a hot frying pan just to brown the bacon and finish in the oven.

EAT! These are so so good! Better than pigs in blankets or any other variation. I could (and did) happily eat a plate of them all on my lonesome.

Now I'm hungry. Guess I'll have to go survey the hotel's afternoon tea....or maybe just have another piƱa colada....


Saturday, 26 January 2013

Oooh, a snowy cookie!

The snow has finally begun to disappear (for us at least, and for now...?) and unfortunately no snow day for me.  For a train service that runs shockingly badly a vast proportion of the time, First Capital Connect actually managed to run services in and out of London with a decent amount of frequency. 

Damn.  I really wanted a snow day.

Anyway, talking of snow that seems like a great segue to another one of the Christmas recipes, Pfeffernusse, more German spiced cookies except these ones look like they've been dusted with snow! 
The recipe - Pfeffernuse (slightly adapted from Chow.com)
For the spiced sugar:
1 cup icing sugar
1 tsp ground cinnamon
1 tsp ground ginger
1/2 tsp ground nutmeg
1/4 tsp ground mixed spice (I used my own mix which you can find here)

For the cookies:
3 cups all-purpose flour
1 tsp ground cinnamon
1/2 tsp baking soda
1/2 tsp baking powder
1/2 tsp ground ginger
1/2 tsp ground nutmeg
1/2 tsp fine salt
1/4 tsp ground mixed spice (again, my own mix)
1/4 tsp freshly ground black pepper
1/2 cup sliced almonds, toasted (I used pre-toasted almonds)
8 tbsp unsalted butter (1 stick), at room temperature
2 tsp packed finely grated lemon zest (from about 2 medium lemons)*
2 tsp packed finely grated orange zest (from 1 medium orange)*
1 cup packed dark brown sugar
1 large egg
3/4 cup honey (I used runny honey)
1/4 cup finely chopped candied lemon or orange peel (or a combination) (I couldn't find any...)

1. Start by making the spiced sugar (although you could equally do this while the cookie dough is is the fridge).  Sift all ingredients together into a large bowl; set aside.

2. Then move onto the cookies themselves....Sift together flour, cinnamon, baking soda, baking powder, ginger, nutmeg, salt, mixed spice, and pepper into a large bowl; set aside.

3. Place the almonds in the bowl of a food processor fitted with a blade attachment and process until finely ground, about 25 to 30 seconds. Add the almonds to the flour mixture and stir to combine; set aside (to be honest, I see no reason why you wouldn't just buy ready ground almonds to save a bit of time!).

4. Place the butter, lemon zest, and orange zest in the bowl of a stand mixer fitted with a paddle attachment and beat on medium speed until fluffy and combined, about 1 minute. Add the brown sugar and beat until incorporated and lightened in colour, about 1 minute. Add the egg and beat until incorporated, about 30 seconds more. Add the honey and candied lemon or orange peel (or mixture thereof) and beat until just incorporated, about 1 minute. Stop the mixer and scrape down the sides of the bowl and the paddle with a rubber spatula.

5. With the mixer on low, add the flour mixture in three additions, mixing until just combined, about 1 1/2 minutes total. (Do not over mix.) Cover and refrigerate the dough until firm, at least 1 hour (go wrap some presents, watch some tv, have a glass of wine...make more German cookies...).


6. Heat the oven to 350°F and arrange 2 racks to divide the oven into thirds. Line 2 baking sheets with parchment paper; set aside.

7. Roll the chilled dough into 24 (3/4-inch) balls and space them 1 1/2 inches apart on the prepared baking sheets. Bake the cookies for 8 minutes, then rotate the sheets from front to back and top to bottom. Continue baking until the cookies are very lightly browned around the edges, about 5 to 6 minutes more. (The tops will be soft, but they will firm up as the cookies stand.) Transfer the baking sheets to 2 wire racks and let the cookies sit until cool enough to handle but still warm, about 3 minutes.

8. Drop the warm cookies into the spiced sugar, making sure to coat them all over, then shake off any excess sugar and transfer to a wire rack to cool completely.


9. Repeat baking and sugarcoating with the remaining dough. Store the cookies in an airtight container, layered between pieces of waxed paper, for up to 3 weeks (if they last that long!).

Yes, I know this pic looks familiar...
So yes, another batch of yummy cookies.  Bueno.

Right, now I need to go and amend my profile because sadly our lovely cat Maverick is no longer with us.  RIP Mav :(

* Not sure what to do with the now naked orange and lemons and the bells of St Clements are nowhere nearby?  Why not make this little aperitif to go with your cookies??

Tuesday, 15 January 2013

Zimsterne (German Cinnamon Star Cookies)

Its Christmas!

Ok so its not. In fact it was about 3 weeks ago now (3 weeks?? How depressing).  Its snowing outside though and Le Pose announced this morning that snow meant it was Christmas, basically because every Christmas song talks about it snowing... She now believes that they are linked and I can't bring myself to burst her little bubble.  Its meant to snow again tonight and I'm praying it does.  Snow. Day. Please.

What does this all mean?  Well, in a convoluted way it means I can still post about my Christmas baking. 

I've said it before and I'll say it again.  Whilst I love the idea of giving homemade goods for Christmas (I once spent a week making truffles for all my co-workers) I still don't really get the whole cookie plate thing.  I do get cookies though.  I bloody love cookies.  My longest running cookie memories are the German spiced Christmas cookies which mum used to always buy from Waitrose, every single year, the minute they hit the shelves.  My family go through bags of them.  It seems though that we were the sole consumer of the cookies and they stopped selling them.  Bastards.  This year I decided that they couldn't be that hard so I figured I'd make some for Christmas Day.  So I did.

I did my usual research on the t'interweb and settled on this recipe because of the great reviews. 

The recipe - Zimsterne (slightly adapted from Food.com)

For the dough:
300g ground almonds
100g caster sugar, sifted
50g plain flour
2tsp cinnamon
2 egg whites

For the icing:
Icing Sugar
Water

1. In a bowl mix dry ingredients for dough.

2. Add egg whites and knead until a still sticky dough is formed.

3. Wrap in cling film and put into the fridge for at least one hour.  I left it in the fridge a good 3hrs mainly because I was trying to get other Christmas bits done!


4. Near the end of cooling time preaheat oven (170 C).

5. Line 2 baking trays with parchment paper.

6. Get the dough out of the fridge and roll it out between two layers of parchment paper or cling film. The dough should be a bout 1 cm thick.

7. Using a star cutter (mine was inherited from my ma!) cut out the stars and place them on the baking tray.

8. Bake the cookies for about 10 - 12 minutes until they go golden brown (but not texture like sun -ha!).


9. Take them out and let cool completely.

10.  While they are cooling mix up the icing as instructed on the packet.  Holding the star by the edge, dip the star flat side down into the icing and give it a wiggle (yes, that's a technical term in Kitchen Lucy).  Repeat for each cookie and allow to dry on a wire rack.


How easy is that??  They keep for a while in an airtight container apparently (and actually taste better and better the more they "age" - aged cookies, now there's a gimmick!), not that Pose let them last that long.  Even when I was making them I kept going into the kitchen to find cookies missing from the cooling rack.  To say she loved these cookies would be a gross understatement.  She's been begging me to make more since!  My little sister took one bite and said they tasted like the cookies mum used to buy.  I hadn't discussed the background to making the cookies so I took that as an almighty thumbs up.


Just one point to note - The actual recipe provides for a meringue glaze instead of the icing but I'm not going to lie, the-OCD-hate-to-throw-anything-away-nutjob-in-me couldn't bear to waste 3 egg yolks.  Plus the reviews generally criticised the meringue glaze so I figured I could do without.  I may try it next time though.

Tuesday, 25 December 2012

Citrus Night, Holy Fizz

IT'S CHRISTMAS!!!


I love Christmas.  It really is my favourite time of the year.  I love the Christmas tree (I strung popcorn this year, it looks pretty cool), I love the giving and everyone's friendly to one another (unless you're reaching for the last "Princess Charm School" Barbie in Toys R Us that I happen to also be reaching for at exactly the same time then I'm sorry, its handbags at dawn, shoulders down, get out of my way, you are not my friend b***h.  Hell, I promised!).  Most importantly, Le Pose is now 3 and is at the age where she is able to enjoy the innocence and magic of Christmas.  Tonight, for example, is Christmas Eve so we happily sprinkled magic reindeer dust on the patio (I've no idea what that is or how it ended up in my house), put the "Welcome Santa" sign out in the garden and then wrote Santa a welcome note and put the special Christmas Cookies (I have been baking 3 days straight....), milk and carrot out for Santa and his reindeer*.  She is so excited she wouldn't sleep and finally fell asleep somewhere around 10pm.  I remember that excitement and I love seeing her begin to experience it.
Of course as soon as she was in bed we began our own Christmas cheer.
Of course I mean booze.
One of the cookie recipe's (this one) required the zest of 2 lemons and an orange and so I had 3 naked citrus fruits being offensive in the kitchen.  Something had to be done....
So I made a cocktail.
The recipe - Citrus Night, Holy Fizz (by ME!)
Juice of 2 medium sized lemons
Juice of 1 medium sized orange
3/4 cup caster sugar
1 tsp mixed spice (I use my own mix which you can find the recipe for here)
Sparkling wine (prosecco or cava is fine)
1. Put everything (not the fizz) into a sauce pan and place over a medium heat until the sugar dissolves (keep stirring).  Keep the mixture bubbling (simmering) for between 5-10 minutes.  Pour into a heatproof dish to cool.
2. Once cool, put about a teaspoon of the syrup (which should have thickened nicely by now) into the bottom of a wine glass/champagne flute (I didn't want to use my crystal champagne flutes - I randomly don't have any others! - so used a wine glass) and top up with fizz.  Give it a bit of a stir and drink!
Nicely aromatic and fizzy, its a great little change to our usual Christmas Mimosa and yes, this one's all out of my own little head.

xx Happy Christmas to all, and to all a good night! xx

*She has also learned all about the nativity at nursery and we have also been talking about the important baby born at Christmas.

Saturday, 15 December 2012

A birthday cake fit for a Princess!

So yes...it's been a while...

A thousand apologies and I really have no better excuse than simply life got in the way. When I started this blog I was embarking on my client secondment to work with a great bunch of people. This year has simply flown by - I guess time really does fly when you're having fun. Work got really busy, home life seemed to all be piling on top of us and I kept downloading damn viruses on my laptop so couldn't write the posts (I am attempting to write this post on the Blogger app on my iPad....). Plus on top of that, my secondment has finished and I am back into the thick of it with work and 2am finishes are all too frequent. I guess I should be relieved that they aren't all nighters! So again, I apologise...

I NEVER APOLOGISE.

Ask my husband.

So moving very swiftly on. My little one turned 3 on Tuesday!! It's all going so fast - how can she be 3 already?! She really wanted a party so we thought we'd oblige, plus she also recently started nursery 2 mornings a week and has a couple of little friends now. We asked her what kind of a party she wanted and despite our attempts to steer it in certain directions, she was adamant she wanted a princess party (we are currently Disney princess obsessed). So...challenge for me then was a princess themed cake. I eventually settled on a castle cake. Cos that's easy right?!

Having discussed it in depth with my Ma and having looked on the Internet for ideas I knew what I wanted to do and what it would entail....and so instantly started panicking. On top of that, I was then told that I had to go to Prague on business the 3 days immediately before her party. Great. Nothing was going to plan. Eventually I ended up baking 3 square 8x8in cakes the weekend before and stored them in my parents freezer....

Fast forward to Friday and T-1 to party day I arrived back from Prague and, once travel presents were doled out, cuddles were given and Pose's were in bed I set about constructing the cake. Unfortunately I was so pushed for time I didn't take any photos of the actual process however it involved:

>> covering the base cake in white rolled icing (I'm sorry to admit I cheated and bought ready rolled sheets of white icing, I just couldn't afford mistakes and so far I have a meh track record with rolled icing) and inserting lollipop sticks into the centre to provide support for the next layer;

>> cutting the next cake to 4x4in square and covering that with more icing (my corners were sooooo clean!! Well chuffed!!) then butchering a plastic cutting board to sit the little cake on to then put on top of the base cake;

>> taking a small tin can that contained coconut cream, dumping that out, washing and thoroughly drying it and cutting the rim off with a can opener, then using that to cut 4 cakes out of the last big square cake and covering those in rolled icing and attaching them to the base cake;

>> with the assistance of the husband, trimming down 4 wafer ice cream cones, covering one with rolled icing then spraying them with edible blue glittery spray paint (I don't know if paint is the right word but...) and once dried attached to the top of the "turrets";

>> brushing edible gold glitter all over the cake;

>> putting mini-marshmallows all around for ramparts;

>> adding mini-bunting (my mum's contribution) to the top and some other flags, gold balls....

I was really proud of it, especially given how little time I had to get it all done. Pose seemed to really like it and the actual cake tasted pretty good - light and moist (yes, moist, I hate that word).


Monday, 16 July 2012

The wait is over!! Cupcake-Vicki-Jackies

Not sure what's happened the past couple of weeks. My blog-tivation has nosedived. I blame the weather (and the diet, who wants to bake when they can't stuff their face with the results??). Utter utter shite. We weren't going to take a sun holiday this year but I've got to the point where I can't bear the rain and the cold and the distinct lack of sun anymore! I mean, its July and I'm wearing a scarf, going to bed in winter PJs and contemplating putting the heating back on. My mother had the fire on on Sunday FFS!!! Needless to say I have announced we WILL be having a holiday and no one can sway me on that.

Grr.

Anyway, so yes, rant over. So all those weeks ago I blogged about the uber cute Mini-Vicki-Union-Jackies and left y'all on tenterhooks* about what I did with the cupcake sized version....

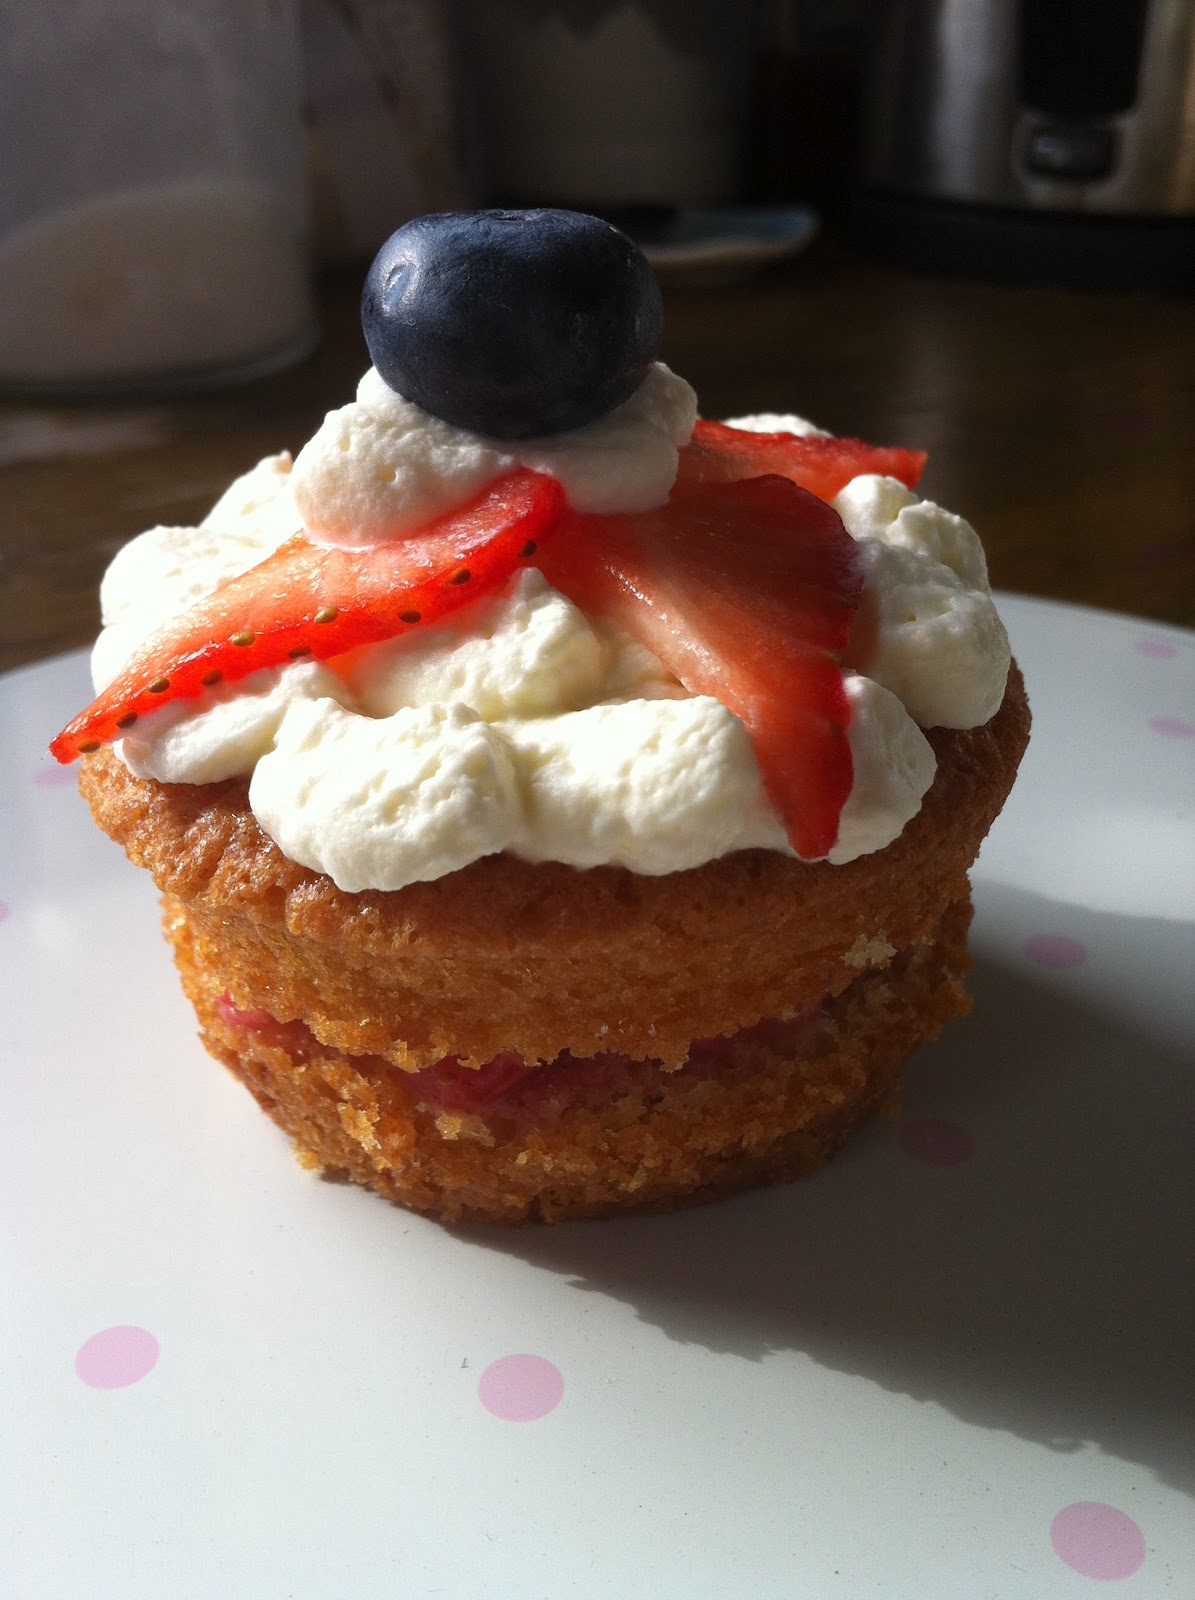
We were going to my neighbours** for BBQ, Booze and Baked Goods (ok, that wasn't an actual theme but well I always bring baked goods whenever possible!). It was still the Jubilee weekend and it still seemed appropriate to be all patriotic so I decided to bring the Cupcake-Vicki-Jackies. Equally cute but a LOT less time consuming than their miniature counterparts, without further ado, I present to you, Cupcake-Vicki-Jackies:

6. So taking the larger cupcake sized sponges and starting at (and replacing) step 6 of the Mini-Vicki-Union-Jackies, spoon the whipped cream into a piping bag (or plastic sandwich bag with the corner cut) and squeeze blobs of cream all over the top (or swirls or spread it, your call).


7. Take a whole strawberry, cut lengthwise into quarters then finely slice each quarter. Decorate the cakes with four strawberry slices (fat end in the centre at the 12, 3, 6 and 9 o'clock positions), a blob of cream in the centre and finish with a blueberry.


                                          DONE! Seriously, that's it! Super simple and pretty tasty.


*FYI, having read the blog my father then sent me an email to explain what "tenterhooks" are....W.O.W. thanks Dad.....
**Read "very bad influence on me"

Sunday, 17 June 2012

Happy Father's Day!

With my job I eat out all the time.  I've eaten in expensive places and cheap places and been both underwhelmed and overwhelmed at both extremes.  I guess I could review all these places and who knows, maybe I will but only when it is worth mentioning.  This father's day weekend, 2 restaurants deserve a mention.

Father's Day Meal #1
Since hubby's football coaching takes over our lives every Sunday, hubby wasn't around today (although that makes it much easier for me as I can take my daddy out and just look after him).  So on Saturday, after he played his present of a round of golf at Luton Hoo, we grabbed our coats and headed out to the Chinese restaurant in town, Chef Peking.  What a brilliant idea.  The food was good, but its not the food I'd go back for, its the staff.  Having an extremely inquisitive toddler I usually find restaurant experiences daunting, overwhelming and a fast-track pass to indigestion.  Pose is usually quite good (and I admit I use my iPad/iPhone as necessary....) but when she's naughty I feel like public enemy no. 1.  You know the look, it screams "why can't you control your child".  Such fun!

Le Pose lived up to my expectations (although she really was not that bad) but the staff were fantastic.  They were all super friendly to us but most importantly, my girl.  Even though it was a busy Saturday night, there was endless patience, smiles and attempts to make her giggle.  Our night was completed with a lollipop for each hand.  Its also worth mentioning the fish tank that helped hold her attention between courses.  There are 2 tables right next to the tank and the next time we go (and there will be a next time with service like this) we intend to call ahead to try to get one of the fish tank tables.

Pose passed out on the way home, a happy little monkey.

Father's Day Meal #2
So on to today and since my mother was away (who can make choosing a restaurant slightly...ahem...tricky) we decided to take father dearest somewhere different.  We all like a good curry in our family so having done a little research into restaurants near(ish) by I booked Chez Mumtaj, an upmarket French/Asian restaurant.  This is also a great restaurant.  The food is super yummy and again, we had great service.  Our waiter made helpful suggestions for Pose and they were fine with our endless trips to see the bubble tank that changes colour.  At one point, in an attempt to let me eat, the same waiter came back having set up a chair for her to sit on next to the bubbles and took her off to enjoy the bubble colours.  She came back after a little while announcing he was her best friend.  When it was time to leave she sobbed. 

They also have a great private dining room which I am eager to try for the next party we do (in fact Rosetta has requested we do that....).

So a Pose seal of approval to each of Chef Peking and Chez Mumtaj.  We'll be back! 

Thursday, 14 June 2012

Mini-Vicki-Union-Jackies

I wouldn't say I'm usually a massive monarchist but the Diamond Jubilee unearthed my patriotic side.  I think its got something to do with Pose - I want her to understand and be proud of her heritage so I was trying to explain to her about her country and our Queen.  I think she understood and by the end of the Jubilee weekend she was chanting God Save the Queen and asking me to sing the national anthem on repeat.  It was super cute.

Anyway, on the Friday before the big Jubilee weekend my team and I decided to have a little Jubilee afternoon tea and of course I wanted to make cakes of some description.  Now what cake to make?  What cake indeed?!  It would have to be a traditional Victoria sponge, and who better to look to for a recipe fit for a queen?  The queen of cakes of course, Mary Berry!  I have to say I was dubious about how good she is until I tried this cake and W-O-W.  That woman seriously knows her stuff.  Of course I had to put my own stamp on it...

The recipe - Mini-Vicki-Union-Jackies (adapted from the great Mary Berry's recipe)

For the sponge:
225 g (8 oz) softened butter
225 g (8 oz) caster sugar
4 large eggs
225 g (8 oz) self-raising flour
2 level tsp baking powder


For the filling:
300ml whipping cream
200g fresh strawberries

For the decoration:
Ready-to-roll white icing
Red food colouring
Blue food colouring
Strawberry jam for "glue" 
Icing sugar for dusting

Makes 9 Mini-Vicki-Sponges and 12 Cupcake-Vicki-Sponges (see next post)

1. Pre-heat the oven to 180°C/Fan 160°C/gas 4. Grease the tins.  


A baking shop has opened near my office (a baking shop? huzzah! yet more ways to spend when I should be saving....), I bought this little muffin pan especially for this recipe.  Its a silicon tray.  My first.  That's right, I just popped my silicon cherry for the queen.

Anyway, I love it and its perfect for little bite-size cakes!


2. Measure the butter, sugar, eggs, flour and baking powder into a large bowl and beat until thoroughly blended. Fill the mini-muffin tray about 2/3 full and then divide the remaining mixture evenly between the 12 hole cupcake tin and level out.


3. Bake in the pre-heated oven for about 25 minutes or until well risen and the tops of the cakes spring back when lightly pressed with a finger. Leave to cool in the tins for a few minutes then turn out and finish cooling on a wire rack.


4.  While the cakes are cooling (they're little so this is pretty quick) make the filling.  Take the strawberries and roughly cut them up, then mash them with a fork.  You are not aiming for mush though, you are aiming for a crush!  Whip the cream till thick and holds its shape.


When the cakes are completely cold, you can start decorating.

5. Cut the cakes in half horizontally; dollop some crushed strawberries onto the bottom layer; dollop whipped cream on top of the crushed strawberries; carefully place the top layer onto the cream and press carefully down.


6. Dust the work surface with icing sugar and roll out some of the ready-to-roll icing and taking a cookie cutter or anything you can find - I used a fluted cookie cutter donated by mother - and cut out a circle for each cake.


7. Spread a thin layer of jam onto the top of the cake and carefully place an icing circle on top.  Smooth over with flat fingers to ensure it is stuck down.


8. Put a couple of drops of red food colouring into a dish and add a little icing sugar to it (to thicken it).  Using a CLEAN thin paintbrush, paint a cross and four diagonal lines onto the icing.  Taking a separate dish, put a couple of drops of blue food colouring in and add a little icing sugar to it.  Paint blue triangles in the spaces between the red diagonal lines (make sense??? Look at the pics....)


TA DAAAAAAA!


I really loved these little cakes.  I was SO SO SOOOOO proud of them.  The cake was super tasty (Mary Berry really knows her stuff), the icing wasn't overwhelming, the filling yummy and they looked freaking awesome!  A perfect little cake for our little Jubilee afternoon tea.
I'll leave you on tenterhooks to see what I did with the Cupcake-Vicki-Sponges....in the meantime you can consider what on earth a "tenterhook" is!?

Tuesday, 5 June 2012

Apple-Cinnamon Fruit Bars (or how I broke my stick blender)

apple + cinnamon = love

FACT

I'm super serial. 

I really do love apple and cinnamon in pretty much any form.  Plus I can convince myself that I'm eating healthy if I opt for apple pie over chocolate cake.  Its fruit right!?

We are on a bit of a family health kick right now and I am currently a huge fan of the Eating Well website.  Its a great resource and gives easy-to-follow recipes for healthy eating, like 500 calorie dinners that are actually tasty.  So, I did a little searching on the website and found a recipe for Apple-Cinnamon Fruit Bars (at a fabulous 193 calories a bar!).

The recipe - Apple-Cinnamon Fruit Bars adapted from the Eating Well website

For the Crust:
⅓ cup chopped walnuts
⅓ cup chopped pecans
⅓ cup rolled oats
1½ cup plain flour

½ cup granulated sugar

½ teaspoon salt

4 tbsp cold unsalted butter, cut into small pieces

1 large egg

2 tbsp sunflower oil

1 tsp vanilla extract

¼ tsp almond extract


For the Apple Filling: 
6 cups diced peeled apples, divided (possibly extra if little fingers keep stealing it)

½ cup apple juice

½ cup granulated sugar

¼ cup cornflour

1½ tsp ground cinnamon

1 tsp vanilla extract


1. To prepare crust: Mix together the nuts and oats.  Combine ¾ cup of the nuts/oats mixture with the flour, sugar and salt in a food processor; pulse until the nuts are finely ground. Add butter; pulse until well incorporated.

Or at least this is how it should have gone had my stick blender not made a popping noise, stopped and then emanated an unpleasant burning smell.  Not to worry!  We have a Cuisinart US stick blender....which hubby plugged in and blew the step-down.  So now no stick blender and Berta's out of action until I replace the step-down.  I was not (and am still not) a happy bunny.

I therefore took my rolling pin and did my best to beat the mixture and then mush the butter into it with a fork.  For the rest of the recipe then I had to improvise:


2. Whisk egg, oil, 1 teaspoon vanilla and almond extract in a small bowl. Add the egg mixture to the nuts/oats mixture and mash and the the mixture begins to come together.  Measure out 1/2 cup of the mixture and combine in a bowl with the remaining 1/4 cup chopped nuts (or oats). Set aside for the topping.


3. Preheat oven to 400°F (about 200°C). Generously coat a 9-by-13-inch baking dish with cooking spray.

4. To prepare fruit filling & assemble bars: Combine 4 cups apples, apple juice, sugar and cornflour in a large saucepan. Bring to a simmer over medium heat, stirring constantly, until the mixture is very thick, 4 to 5 minutes. Stir in the remaining 2 cups apples, cinnamon and 1 teaspoon vanilla.


5. Transfer the dough to the prepared baking dish. Spread evenly and press firmly into the bottom to form a crust. Spread the fruit filling over the crust.. Sprinkle the reserved topping over the filling.


6. Bake the bars for 15 minutes. Reduce oven temperature to 350°F (about 175°C) and bake until the crust and topping are lightly brown, 25 to 30 minutes more. Let cool completely before cutting into bars, at least 1 1/2 hours.


These were pretty yummy and totally more-ish.  On the one hand you have a "healthy" sweet snack (starts well) and then on the other hand you kinda can't stop eating it (ends badly).  So as with most things it starts with good intentions and then...well you find you've eaten the entire tray...


Ooops

Tuesday, 22 May 2012

The Inappropriate Muffins

"Mummy lets make butterfly cookies" the Pose asked one Sunday while we were eating lunch.
"Ok Pose, if you are a good girl and eat all your sandwich we can make cookies" I lovingly replied.
"Ok mummy"

That's a verbal contract in my book.  

She didn't eat her sandwich.

Not the end of the world I grant you but with the current battle-of-wills-Mexican-style-stand-offs we have begun enduring as our little person demonstrates she has indeed inherited both her father's AND mother's stubborn-must-always-get-my-own-way-nature, I was determined to stick to my guns (ah the sweet sweet irony).

Within an hour I was feeling bad about it.  I had been away on the Thursday night for a biz trip and was departing for another 4 days on the Monday and wanted to have a nice Sunday with Posie.  I had also decided that it would be nice to leave something baked for them to eat while I was gone.  Plus muffins aren't cookies right, so I technically still won this battle (at least I'll keep telling myself that).

We all love blueberry muffins so it seemed logical that I'd make those to leave as a token of my love for my little family (ahhhhhhh).  Now here's where I admit that I've never made blueberry muffins from scratch.  Don't get me wrong, I've made them before but with a little help from Betty Crocker!  We have a little shop at the end of our road and they always have blueberries so we popped down to pick up a punnet.  Except they didn't have any today.  Le Pose spotted strawberries and bright little thing she is, suggested strawberry muffins.

After a little peruse on the t'interweb I found this recipe which seemed like good brekkie fodder...

The recipe - Strawberry Oatmeal Muffins courtesy of the Yummly website

1 cup all-purpose flour
1 cup rolled oats
2 tsps baking powder
½ tsp baking soda
½ tsp ground cinnamon
½ tsp salt
1 beaten egg
½ cup milk
¼ cup olive oil (light)
½ cup sugar
(I used caster)
½ pt strawberries (chopped fresh)

1. Preheat oven to 425 degrees F (220 degrees C). Grease 12 muffin cups (I just put muffin/cupcake cases into muffin tins, I didn't bother with the oil). 


2. In a large bowl, mix flour, oats, baking powder, baking soda, cinnamon and salt. In a separate bowl, whisk together egg, milk, olive oil and sugar. Mix in strawberries. Stir strawberry mixture into oat mixture just until evenly moist. Spoon into prepared muffin cups.

3. I then thinly sliced some strawberries to use for decoration and carefully pressed a slice into the top of each muffin.

4. Bake 18 to 20 minutes in the preheated oven, until a knife inserted in the center of a muffin comes out clean.
Ummmm...
They tasted great and at only 174 calories were great for a low cal breakfast (I found dumping low fat yoghurt on top made it even yummier).  The Pose and the hubster both enjoyed them so it made me very happy.  Until hubster made a comment on the appearance.  I was horrified.  These were made with the little one's "assistance" so I felt awful that without thinking I had made "inappropriate" muffins with my toddler....ooops.*


* If you can't see it I'm not explaining!  How embarrassing....(*hands her head in shame*)

Tuesday, 15 May 2012

Intermission

This week has been a poor week for blogging.

  1. My mother-in-law has been visiting so I do not want to be antisocial and sit blogging all night and ignoring her (its fine when its just hubster and I.  Usually we happily ignore one another on our respective laptops - him breaking down film or planning football (American not UK) plays (the word "spread" has 2 very different meanings in our house) or that week's practice; me prattling away on the blog or baking).
  2. Work has been super busy, so I've been particularly distracted and mega-S-T-R-E-S-S-E-D.
  3. I was ever-so-slightly suffering on Saturday from a boozy late night with my neighbour (all for a good cause mind!  She offered (read *bribed*) me with wine to help make posters for the local school fete).
  4. Because of #1 I was determined to demonstrate my baking skills...
    • I went to make Pizza again on Saturday night and despite it being a breeze the last time, it was a complete disaster this time.  First batch (yes, that's first) I got all the ingredients out, followed the recipe and then couldn't understand why the dough wasn't coming together.  I then looked at the bag of flour.  It was rice flour.  I was trying to make Pizza dough with rice flour.  What was more stupid is that when I had been doing the yeast part of the recipe (at the VERY BEGINNING) I had been reading the back of the bag and finding it bizarre that the "bread" flour had recipes using rice flour.  Why I hadn't looked then when it was blindingly obvious....I don't know.  
    • The second batch the yeast wouldn't activate so the dough wouldn't rise.  On the plus side I said I wanted thin crust and I certainly got that.  We cooked both up and they tasted ok, just ok though, and certainly nowhere near as good as last time.
    • I then went to make a cake for US Mothers Day.  It was all going very well until I put the cakes in the oven.  When the timer buzzed I went to take the cakes out and I clearly have a problem with my oven.  The top of each was half dark half still raw.  Grrrrreat!!  So I had to put them back in and each cake cracked (and when we cut into them it was clear they could have both gone a bit longer).
    • When I went to make the icing that all ballsed up too (it looked all curdled because it had lemon juice in and wouldn't thicken).  At that point I considered my baking confidence well and truly knocked.
Heard this before? Pride? Falls?  Its total foobah.   Basically nothing went right and so here I am ranting about it.

Oh, and I've eaten my bodyweight in unhealthy food so I'm now squeezing myself into my clothes.  Joy.

Think happy thoughts...think happy thoughts....think happy thoughts.....think....

Sunday, 6 May 2012

Bubble and Squeak (no mice were harmed in the making of this breakfast)

Anyone would think my family subsists on mashed potato* - well not quite - although we are rather partial to it.  Invariably we always have leftover mash so I am always working out ways to use the leftovers the following day as part of my OCD-can't-throw-food-away personality.  We're also partial to good breakfast/brunch grub.  In fact one of the big things we miss about living in the US is a good diner breakfast.  Home fries, nice runny egg (sunny-side up of course!) and crispy bacon...or eggs benedict.  Yum.  I'm hungry just thinking about it.  All in all it means that if we have time breakfast can become a big deal in our house.

Saturday I was in cleaning mode and had my eyes on the fridge that really needed a deep-clean (q-tips at the ready people!).  In order to get the job done I was trying to empty the fridge as much as possible.  I was looking at leftover mash, white cabbage, bacon and eggs.  No thinking required, Bubble and Squeak seemed obvious.

I'm not quite sure of the origins of Bubble and Squeak but as far as I can tell its a pretty traditional British dish that involves mashing/mixing all your leftovers together and frying them up.  Most people go for the mash/cabbage mix (certainly my folks do) so it seemed like a logical choice.

The recipe - Bubble and Squeak

1 cup mashed potato
1 cup cooked cabbage, finely shredded (I used white but equally you could use spring greens etc)
2 rashers of bacon, cooked and finely chopped
1 tsp onion powder (alternatively use 1 small onion, I had none though - extremely unlike me!)
4 fresh basil leaves, finely chopped (I grew a ton so I've been trying to use it a lot - I feel so smug)
salt and pepper, a good grind of each (tee hee, grind)
1 egg
butter for cooking

1. Preheat the oven to 200C.

2. If you do not already have cooked cabbage start by cooking the cabbage.  In a saucepan heat a tablespoon of butter with a tablespoon of water until the butter is melted (I recently learnt this trick - it apparently emulsifies and coats the cabbage to give it tons of flavour - it does and I could happily eat just a bowl of cabbage cooked this way).  Put the shredded cabbage in the pan and cook until wilted.

3. In a large bowl, put the mashed potato, cabbage, bacon, onion powder, basil, salt and pepper and mash it all together with a fork until the ingredients are well combined.


4. Butter a small oven-proof frying pan and warm over a medium heat.  Mash the mix into the frying pan and press firmly down.  Then cook over the medium heat until the edges start to brown (about 5mins).  Dot butter all over the top and put the pan in the oven for 10mins.


5. In the interim, in a separate frying pan fry the egg sunny-side up until the white is cooked.  Unless you really don't like a runny egg please please please put a runny egg on top!

6. You may want to put the Bubble and Squeak under the grill to get the top nice and brown if it hasn't browned enough.  Ease the Bubble and Squeak out of the pan and serve with the egg on top!

Tuck in!
The recipe above serves 1/2 people depending on whom you're cooking for or if you do anything else with it.  Hubster wanted it all for himself so this served 1...equally we could have served half each with some sausages or beans (Heinz of course!).  Whatever you fancy.


*For example, the uber yummy sausage cakes.